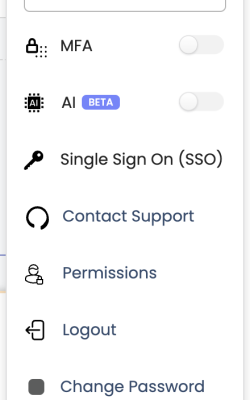
Multi Factor Authentication
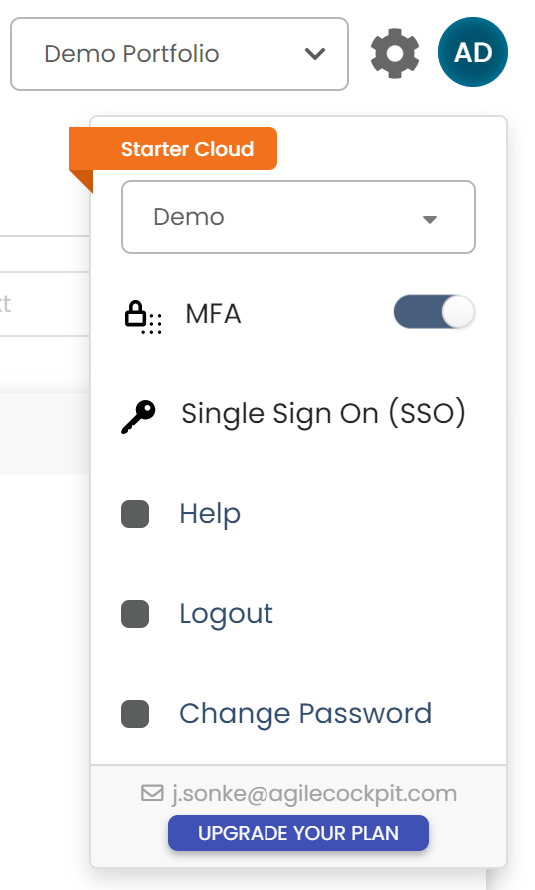
You can secure your account by using a Multi Factor Authentication. By switching on the toggle in the account settings, all users will be asked for a extra authentication at logging in to the tool.
The user will receive a authentication code via the email.
This setting is only usable for an admin user.
Single Sign On
You can simplify the login with using the Single Sign On option and connect your account to your own identity provider. The admin user can use the option Single Sign On in the account settings. The tool will guide you to the steps to connect your identity provider to your Xeleron Cockpit account.
At the moment of login, your users will be asked for their login credentials of your identity provider.

Users
Via Manage Portfolio/Users you can add the users to your account. Based on your license, you can add your users. Once you add a new user, the user will receive an account activation mail.
You can choose if a user will be an admin of the account via admin icon.

Portfolio
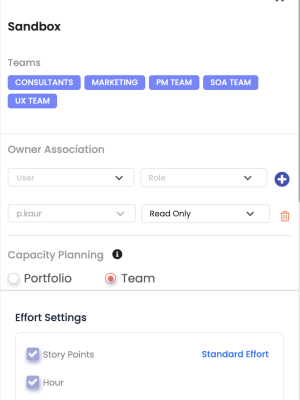
you can manage your portfolio or create a new portfolio via the Manage Portfolio/Portfolio.
- New Portfolio: you can add a new Portfolio. You can have multiple portfolios within your account. Choose specific teams for the portfolio.
- Add users: Once the portfolio is created, you can add the users for the specific portfolio and give them the right role within the portfolio.
- Manage capacity: You can also choose if you want to have your capacity for the portfolio based on the entire portfolio or the teams within the portfolio.
- Effort type: Choose effort types you want to use in your portfolio and which effort type will be used as default type.
- Work item type: You can manage the custom work item types that you want to use in the portfolio. you can not make any selection in the standard work item types.
Permissions
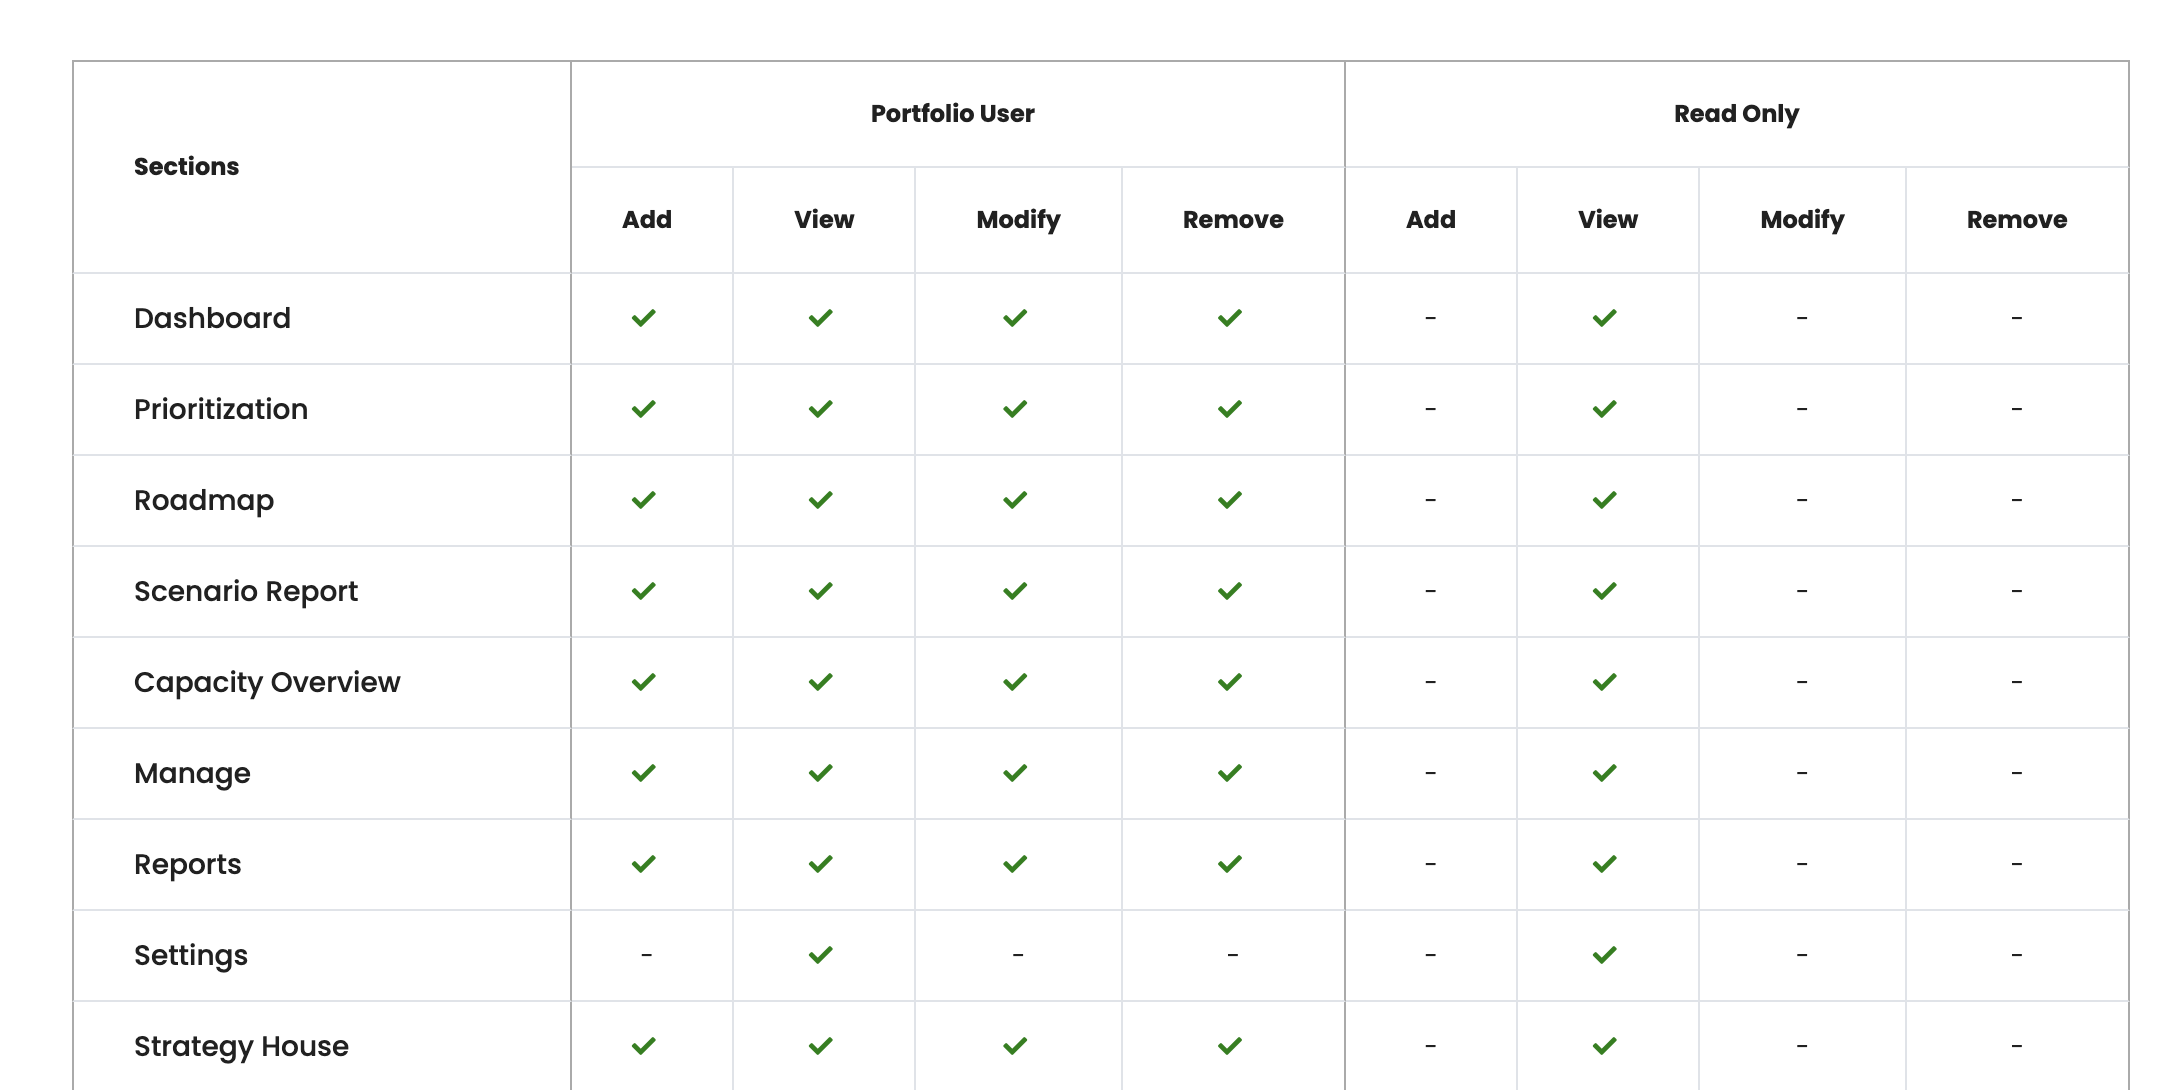
There are 3 different roles with respective permission:
- Administrator (this role will have permission for full access)
- Portfolio User (all except settings)
- Ready Only (only view)
Teams
You add your teams via Manage Portfolio/Teams. These teams can be used later to add them to a portfolio.
Once the teams are associated with portfolio, the work item can also be mapped with teams.
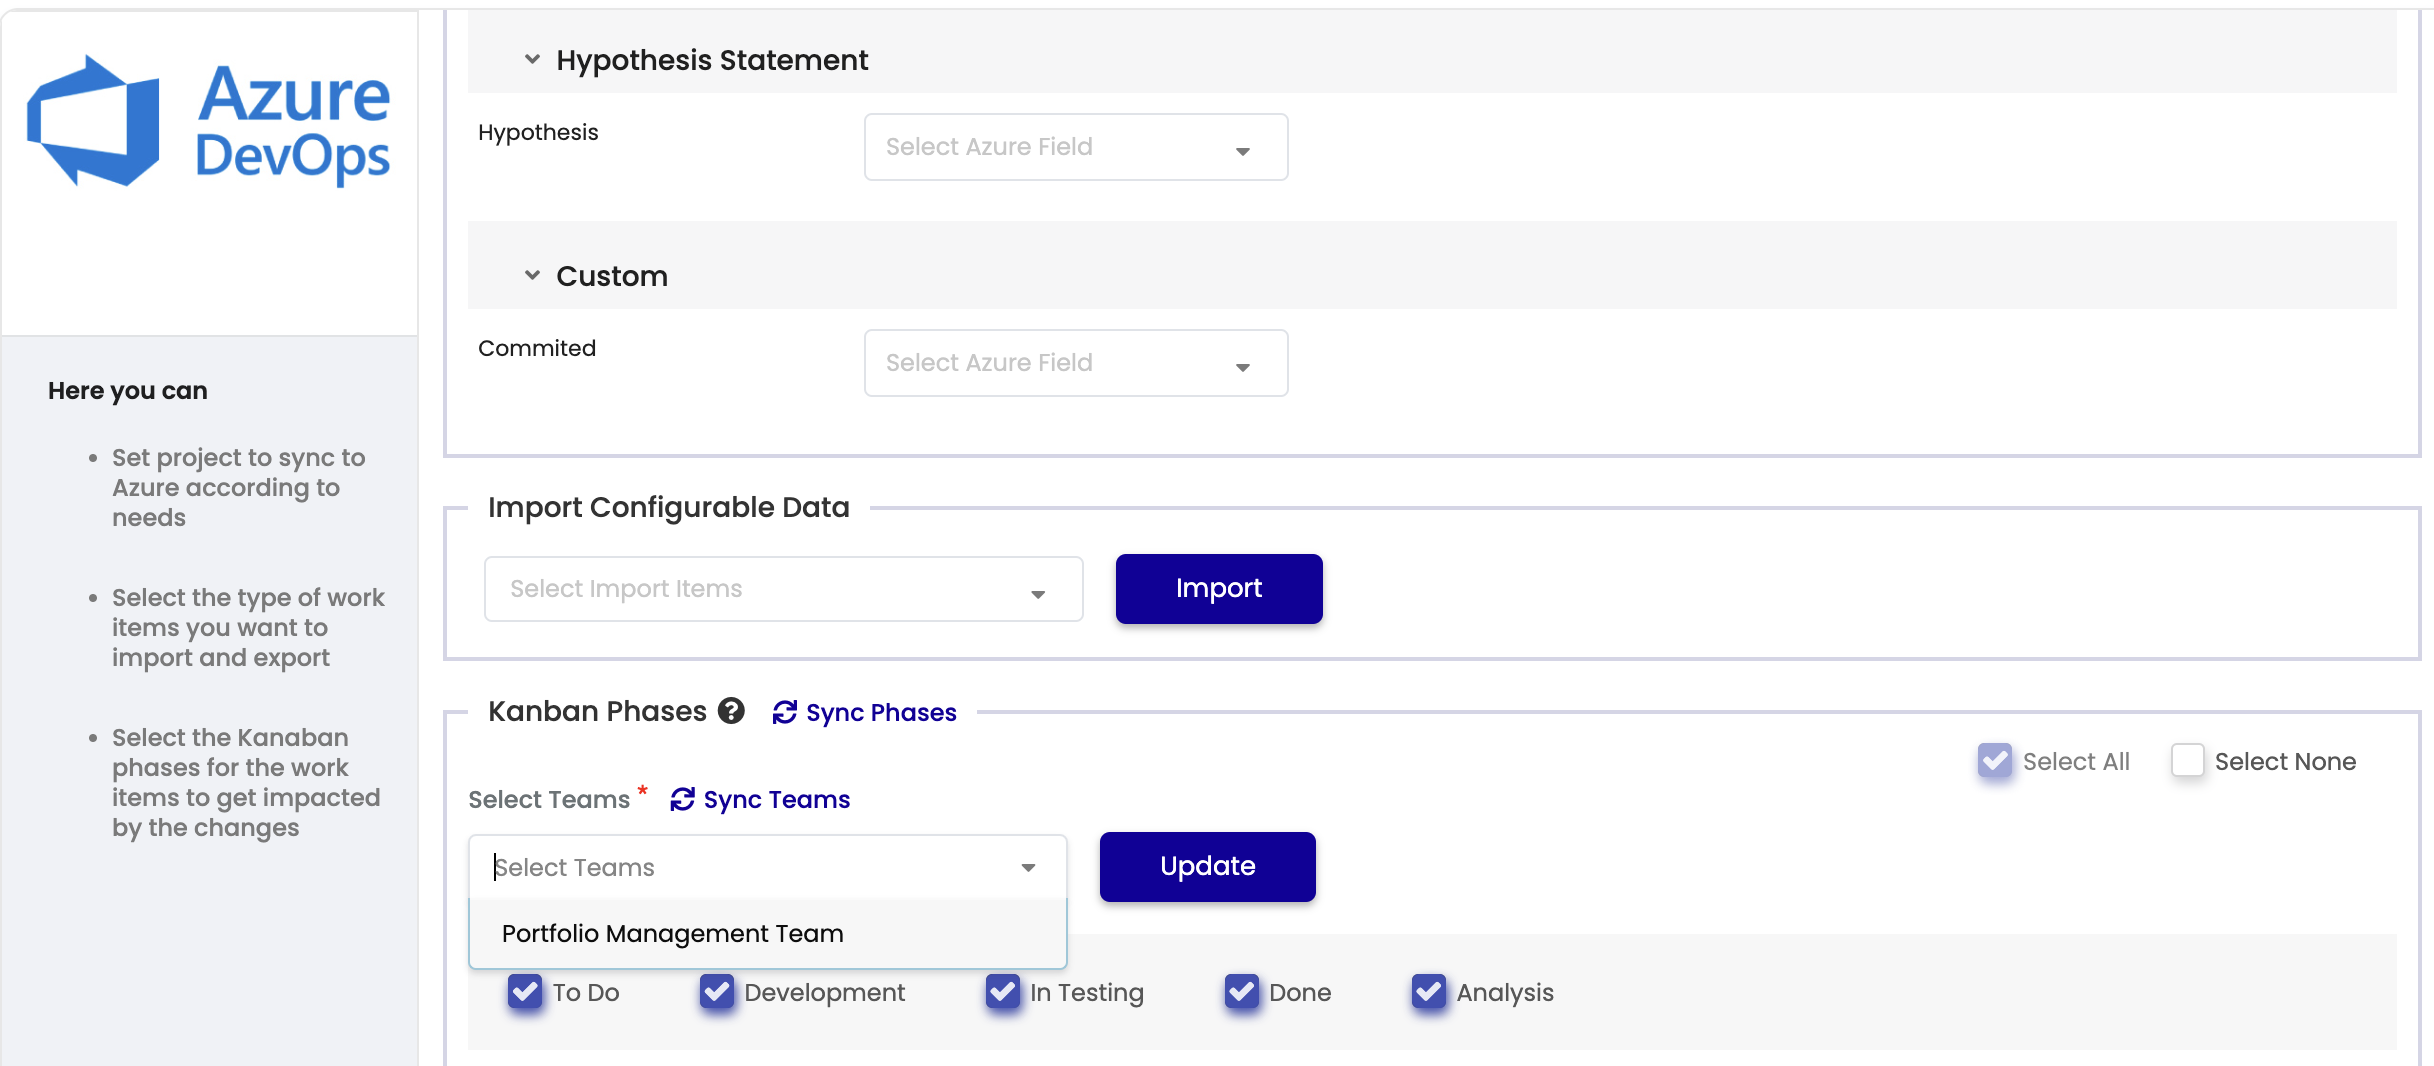
If the portfolio is integrated with ADO/JIRA
– The teams are fetched from ADO/JIRA and mapped with the integrated portfolio.
– In ADO, there is an option to choose specific team boards to restrict the work items from ADO.

T-shirt sizes
You can add as many t-shirt sizes as you want. Per t-shirt size you need to give an unique value. These values will be used in the calculations of the prioritization.
Once you create a prioritization model, you can also add descriptions to your t-shirt sizes.

Custom Fields
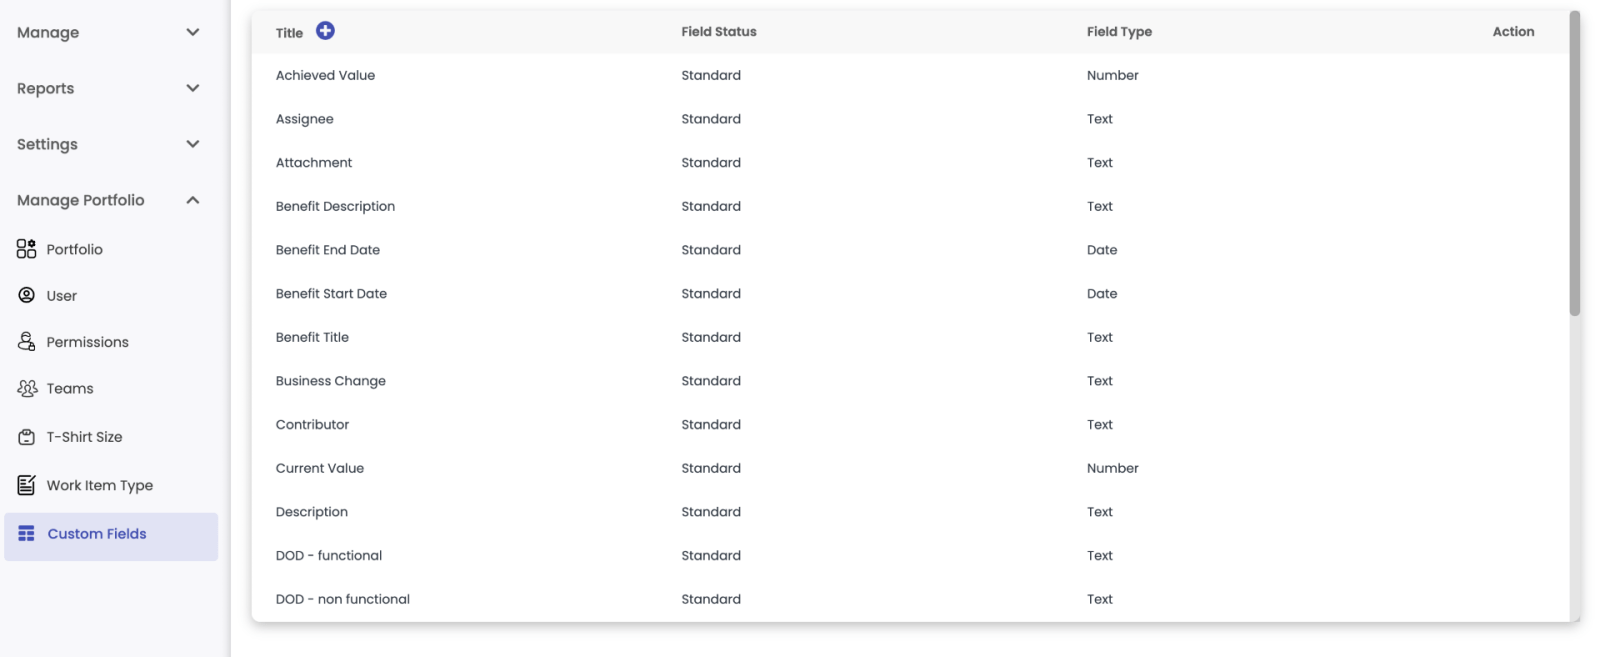
- Custom fields can be created by Account admin using Manage Portfolio -> Custom field. The page displays all existing standard fields and the custom fields generated within account.
- Custom field can be simple text, Number, Date, Select(single choice, multi choice)
- Once custom field has been created, it can be mapped with work item statement using Settings -> work item settings -> General Settings
- User can choose the custom field from the dropdown “Add new custom field” or if the custom field does not exist click “+Add custom field” to create new field.

- Integration with ADO/Jira : Custom fields can integrated with ADO/Jira custom fields same as standard fields are integrated. Few points to notice while integrating
- Keep in mind the type of field and map with respective type of field to get correct results[e.g. map text => text, date=> date, select list =>picklist]
- If the field is picklist, and new values are added or updated in ADO. Refresh the list in portfolio tool to get updated list
- User is not allowed to edit and delete the values of picklist in portfolio tool
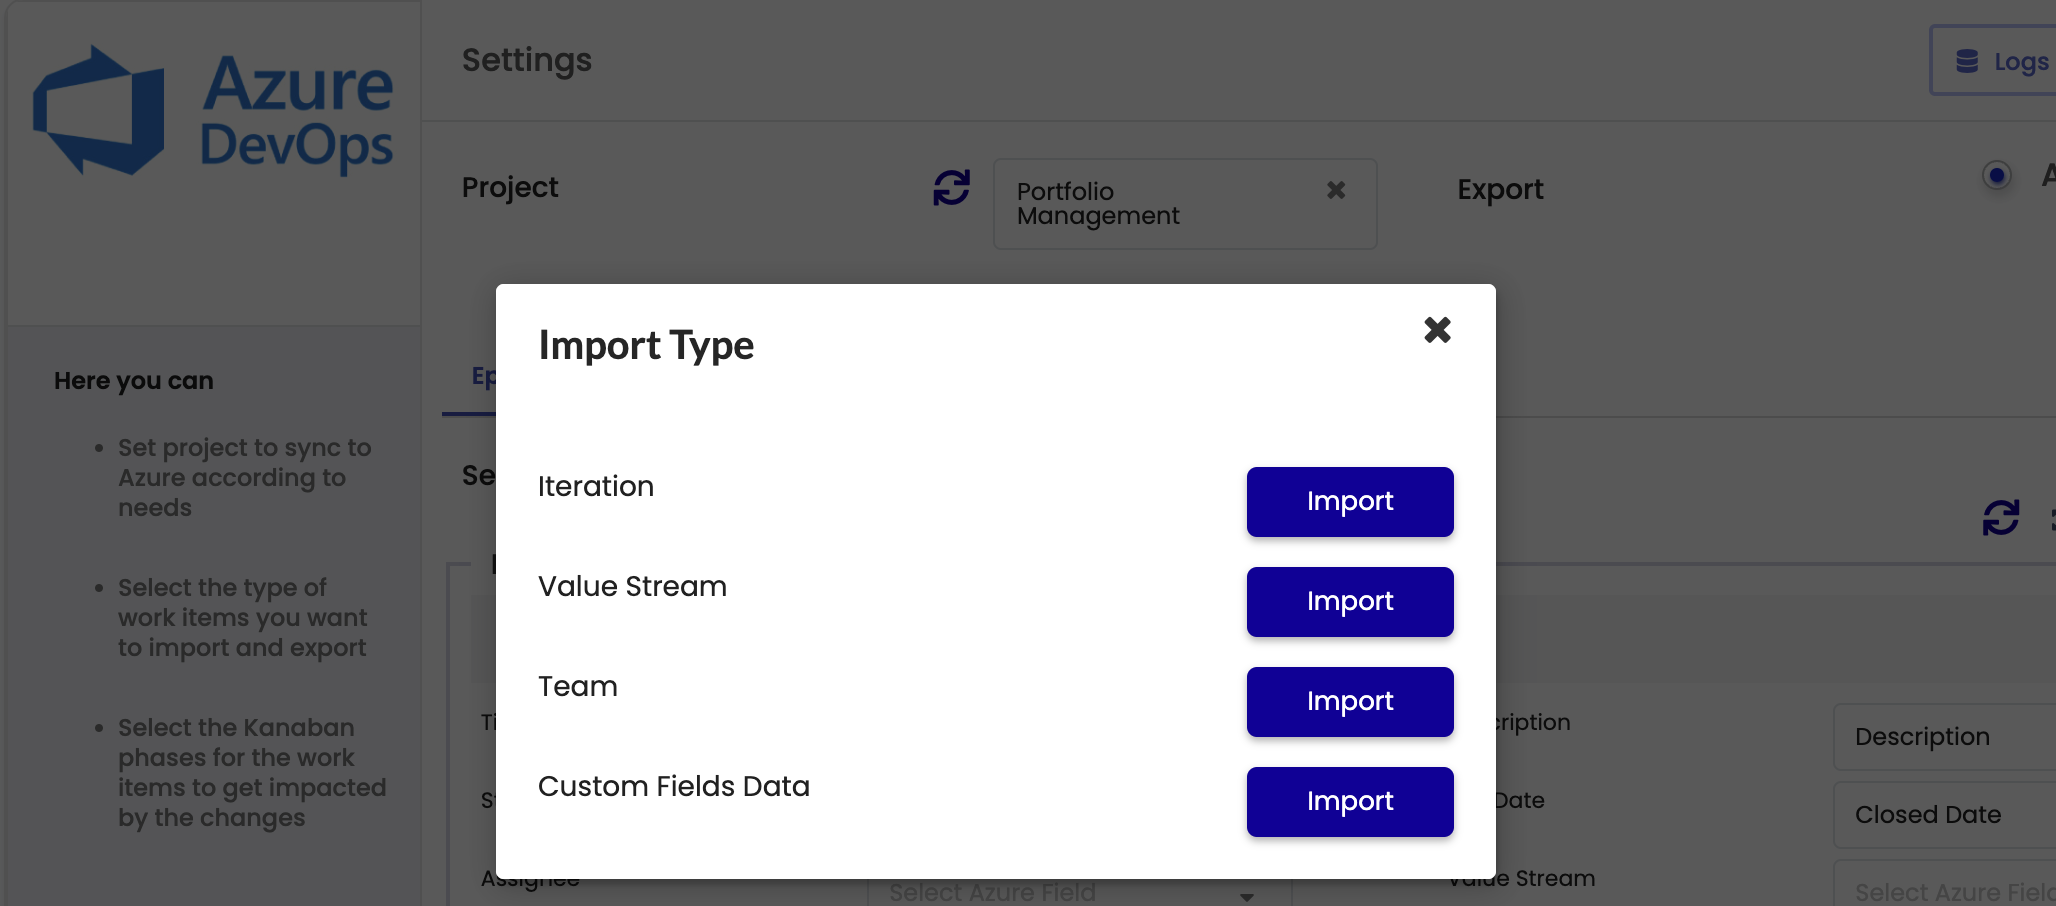
- To refresh the pick list in portfolio tool go to Azure Integration page ->Import configurable data -> choose custom fields data. It will fetch all latest values for all pick lists.

- Filters on custom fields :The custom fields can be enabled for filtering the results in work items, scenario, and reports. To enable the filtering on custom fields, follow below process:
- On create or edit custom fields, choose ‘Show in filter’ as yes.
- After enabling the setting, the field will start appearing in all filters.

Multi Factor Authentication
You can secure your account by using a Multi Factor Authentication. By switching on the toggle in the account settings, all users will be asked for a extra authentication at logging in to the tool.
The user will receive a authentication code via the email.
This setting is only usable for an admin user.
Single Sign On
You can simplify the login with using the Single Sign On option and connect your account to your own identity provider. The admin user can use the option Single Sign On in the account settings. The tool will guide you to the steps to connect your identity provider to your Xeleron Cockpit account.
At the moment of login, your users will be asked for their login credentials of your identity provider.


Users
Via Manage Portfolio/Users you can add the users to your account. Based on your license, you can add your users. Once you add a new user, the user will receive an account activation mail.
You can choose if a user will be an admin of the account via admin icon.
Portfolio
Before you can start using your account, you need to set up your first portfolio. Via the Manage Portfolio/ Portfolio setting, you can add a new Portfolio. You can have multiple portfolios within your account. Once the portfolio is created, you can add the users for the specific portfolio and give them the right role within the portfolio. You can also choose if you want to have your capacity for the portfolio based on the entire portfolio or the teams within the portfolio. The last step is to choose with effort types you want to use in your portfolio and which effort type will be used as default type.


Permissions
In the section Permissions in the Manage Portfolio settings, you can choose which access rights each role will have. Per role you can define with access rights they have per section in the tool. There are 4 user types:
- Administrator (this role will have permission for full access)
- Portfolio Owner
- Portfolio User
- Ready Only
Teams
You add your teams via Manage Portfolio/Teams. These teams can be used later to add them to a value stream or link them to a work item.


T-shirt sizes
You can add as many t-shirt sizes as you want. Per t-shirt size you need to give an unique value. These values will be used in the calculations of the prioritization.
Once you create a prioritization model, you can also add descriptions to your t-shirt sizes.
Custom Fields
- Custom fields can be created by Account admin using Manage Portfolio -> Custom field. The page displays all existing standard fields and the custom fields generated within account.
- Custom field can be simple text, Number, Date, Select(single choice, multi choice)

- Once custom field has been created, it can mapped with work item statement using Settings -> work item settings -> General Settings
- User can choose the custom field from the dropdown “Add new custom field” or if the custom field does not exist click “+Add custom field” to create new field.

- Integration with ADO/Jira : Custom fields can integrated with ADO/Jira custom fields same as standard fields are integrated. Few points to notice while integrating
- Keep in mind the type of field and map with respective type of field to get correct results[e.g. map text => text, date=> date, select list =>picklist]
- If the field is picklist, and new values are added or updated in ADO. Refresh the list in portfolio tool to get updated list
- User is not allowed to edit and delete the values of picklist in portfolio tool
- To refresh the pick list in portfolio tool go to Azure Integration page ->click refresh button -> choose refresh custom fields data. It will fetch all latest values for all pick lists.

- Filters on custom fields :The custom fields can be enabled for filtering the results in work items, scenario, and reports. To enable the filtering on custom fields, follow below process:
- On create or edit custom fields, choose ‘Show in filter’ as yes.
- After enabling the setting, the field will start appearing in all filters.

Contact
2612CT Delft
Netherlands
+31 (0)15 2411 880
info@xeleron.nl